Tuesday, April 23, 2019

Distinguishing parallel tracks

The Stacy St. Yard complex on the Burrlington Northern ended up being a sea of parallel tracks. This is partly because it began in a different house as a seven-track staging yard, and then I converted it to a working yard. For many years there were seven parallel tracks of unpainted flex track, and it was difficult to tell which tracks were main tracks and which had other uses. Different colors of ballast would be an obvious solution, but it takes time to do. A few months ago we did ballast the two main tracks in a light grey to make it clear that those were the main tracks. But the rest of the tracks still looked the same. Recently, we decided to paint the rails different colors to represent their usage, and to paint the ground between them to create several "zones". The photo below shows the result. At the top is the "house track", painted a rusty color. Next is the "mud track", which was used for temporary storage of cars set out by passing trains, colored a muddy color. The next two are the ballasted main tracks with a dark grey rail color. The rest of the tracks are in the yard, painted "rail brown", but the first three are arrival/departure tracks, so we put grey paint on the ground between them, and then for the classification tracks we painted earth and weeds. It will be nice to get these tracks ballasted, but for now this rail and ground paint is already a big improvement.

Hopefully this will give crews a better instant visual cue as to which tracks are which.

We also put labels on the tracks, but of course they only work when cars aren't covering them up.

These last two pictures also show the complexity of the yard layout, hence the need for cues to distinguish track purposes. In the photo below, to the right of the main classification ladder in Stacy St. is the "Waterfront Yard", which was used for supporting the MILW car barge operation, and we also use it for handling runs to Harbor Island and West Seattle.

Thursday, April 11, 2019

Burlington as an ideal LDE

You've probably heard the term "LDE", referring to "Layout Design Element", and the idea that a layout is simply a string of LDE's in a row so trains can run between them and stop at each one to do work or meet other trains. My layout is certainly like that, and every time I turn around I'm adding another LDE and another level of operational complexity, and I can't seem to stop. One advantage to this is that each additional LDE can absorb a certain number of freight cars, so I can keep increasing my fleet without gumming up the operation too much, or learning the discipline to "thin the herd."

But I am also heard to say, "If I'd known how much fun Burlington would be to operate, I don't know if I would have bothered with the rest of the layout that came before it." This post elaborates on that idea.

Burlington is a small town just north of Mt. Vernon, between Everett and Bellingham, that has a five-track interchange with branch lines to the east (Concrete Branch) and west (Anacortes Branch). A switch crew was stationed there "the Concrete Local", and the Anacortes Branch was served by the "Annie local" which came north from Everett for the trip west. The Anacortes Branch served the Port of Anacortes, two major refineries, at least one grain elevator, and, in recent years, a major sawmill. The Concrete Branch brought logs out of the mountains, silica, and the output of a major cement plant in Concrete. In later years it also served a locomotive restoration company that worked on, among other things, overhauling the engines from the White Pass and Yukon. Do I have your attention yet?

Here is a picture of the schematic map of the area on my layout, from the SPINS booklet, including the names of real and fictitious industries that we serve there. It generally takes four to six real hours for the Concrete Local to get all the work done there, which to my mind is long enough for it to be considered a complete layout in its own right. It certainly is a respectable LDE!


I don't have the space to extend the Anacortes or Concrete branch any distance, so in essence they function as staging tracks. All you would need would be a staging yard to the north and one to the south, and this could be a very satisfying first class railroad switching layout! (In my case there are another five or so towns with yards to the south of here, so one of the problems is that it takes too long for the Burlington-bound traffic to actually show up, but that's another story for another time.) Here's a photo of the modeled yard, seen from the north end:


This photo shows the center of the yard, with the mainline ballasted in grey, and the Anacortes Branch off on the right side near the aisle:

And finally, this shot during an op session, with the Concrete Branch tracks in the foreground and NW Olivine on the upper left (note the crude stand-in blue backdrop - it'll do for now!):

Just a note on NW Olivine - this industry mined very fine sand from the Skagit River, for use in, among other things, locomotive sand towers. This is one of those rare instances where it is ok to bill a sand car from Concrete directly to one of the engine terminals on the layout, an "intra-layout" move!

But the main point is, as an LDE, Burlington yard and vicinity is worth taking a look at, and fun to operate!


Friday, March 8, 2019

a simple pick-up

The other day I discovered that one of my N scale railbox cars was derailing because one of its wheelsets was slightly out of gage. So I replaced it and the derailment stopped. So I put the boxcar back on the layout, by itself, on the siding in the mill town. This meant it was out of the train it had been in. So this called for an operation - pick up the repaired car. Photos below show the operation step by step.


Friday, March 1, 2019

thoughts on siding length

A friend asked me recently what I thought about the tradeoff between siding length and distance between towns. I wrote him a reply and thought I would copy it here as well. Just my thoughts.

My sidings are between 36 and 40 “40-foot car lengths” long, which is between 18 and 20’. We generally run with the rule that the maximum train length is 25 cars plus locos and caboose, which generally works fine (for the 1973 era when the average car length is more than 40 feet), and then sometimes the superintendent will give approval for a longer train, and sometimes that means saw-bys at sidings, which are always fun and can be the highlight of the session, especially if three trains are involved, which happens more frequently than I would expect. I don’t think in HO, especially in the transition era, that you need longer sidings than 20 feet. For one thing, it’s too complicated for operators to keep track of what to do with that many cars, among other things. And a 20 foot long train feels like a big deal when you’re running it.

The distance between towns is obviously a key tradeoff, that I have some random thoughts about. I tend to experience an op session as having two modes: local switching and mainline running. I’m in either one or the other. So in my switching mode I don’t care if the next town is nearby because my mind is caught up in which cars go to which town. If I’m mainline running, all I care about is whether the track ahead is clear, which is an issue no matter how much space there is between towns. And even if you run the train painfully slow, you are in the next town before you know it, with our condensed distances. I was just at an op session last night at Bill Sornsin’s layout, and it struck me that, while it was true that we were using a timetable to protect for first class train movements, the length of time it took the Empire Builder to get from Everett to Seattle was so short that for all practical purposes we (those of us with switching jobs) just all stopped work while a first class train was running, and then resumed afterwards. Especially because the train was a gorgeous brass model that we couldn’t take our eyes off while it was running. Another point from operating at Bill’s - I was operating the Sky Local and switching at Edmonds one day while Gary Jordan was switching the Oiler at Richmond Beach, and the distance between the two is about a train length. So we had to coordinate with each other, which made it more fun than operating alone. I guess the bottom line is that I tend to enjoy switching more than mainline running, so I prefer more towns and yards and less distance between towns. But I also don’t think you need sidings longer than 20 feet. I wouldn’t go too much less, because you want a decent train length behind those massive 2-8-8-2”s! Bill ran one of those last night that was so cool, it almost made me weep!

Three more points on this. The length of my sidings was basically dictated by layout geometry, trying to get them as long as possible. As a result, they are all slightly different lengths. This adds an element of fun for both the operator and dispatcher to keep track of whether a particular meet will work, and of course if it won’t we are back to the always-enjoyable saw-by. So what I’m saying here is that the tradeoff between siding length and mainline run is something that you could make differently on different places on the mainline, rather than a layout-wide decision, and having operators adapt to it will be part of the fun of operating there.

Sometimes the territory you’re modeling is a combination of double track and single track, urban and rural. (with the odd exception here that the mainline through Balmer is single-track!). I have a feeling that the tradeoff is different in the two zones. I experienced this at Bill’s also, where at the same time Gary and I were enjoying fighting over one of the mainlines between Edmonds and Richmond Beach, we were both assiduously keeping the second main track open for the impending passage of the International. Out in the rural areas the pace is just so much slower in general, so I don’t think the distance between towns is that much of an issue.

Finally, if there is any significant amount of switching in a town, I have found it very valuable to have a crossover somewhere in the middle of the siding. Not only does this make runaround moves a lot quicker and easier, it introduces a lot of options for having shorter trains meet each other or get out of the way of the varnish. I have crossovers in the middle of both Everett Bayside and Burlington, and they are both used more frequently than I might have expected. You’d be surprised at how crazy it gets when a local and a switcher are both holding on the siding for the arrival of a through train, and then it turns out that the through train needs to drop some cars there. Hopefully the train is blocked properly, or it can take so long to resolve this that the whole railroad is plugged up!

Tuesday, February 26, 2019

MILW car barge slip in Seattle

After many years of looking like this:


The Milwaukee Road car float slip finally received its sheet piling today. Here are a few progress shots:


The sheet pile is an Evergreen Styrene product painted with a random blend of acrylic rust and graphite colors, and glued on to the plywood base with Aileen's super tacky glue. My plan is to cut some sheets of 1/8" clear acrylic to make a block of water for the car barge to rest on, representing the water level. Stay tuned.

Sunday, February 24, 2019

Bethlehem Steel

The Monroe Swap Meet this weekend provided an unexpected boon to the Steel industry on the Burrlington Northern - someone was "downsizing his layout" and sold me a built-up transfer crane that's just the right size to sit on top of the two tracks currently serving a location that I call Bethlehem Steel, even though all it had been was a single brick building. Now the scene looks much more convincing as a steel-handling industry:


This is still a temporary location for Bethlehem Steel - the new expansion in West Seattle will eventually create a larger space for a better model of the plant, but for now it will do as a place to receive scrap and ship steel products. Here is one photo of the prototype plant, shot in 1972 and published by MOHAI:


Looking forward to modeling this one day! :)

Saturday, February 9, 2019

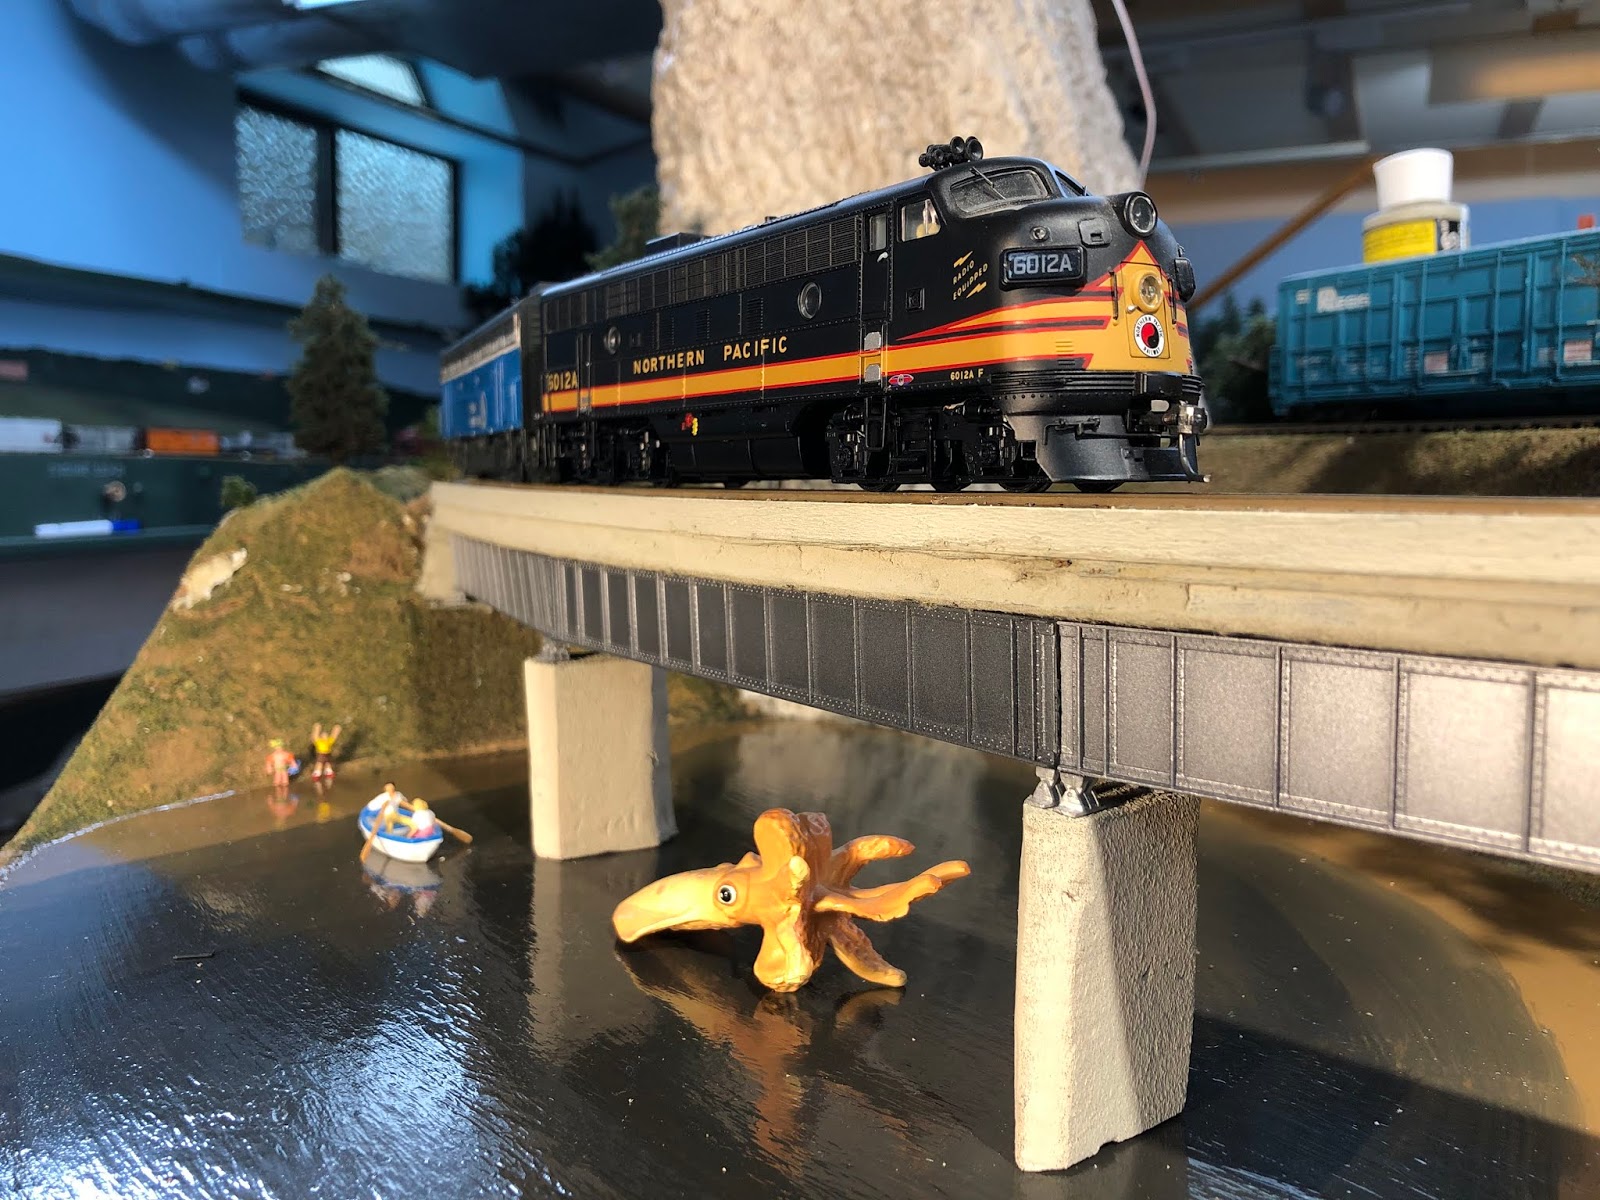
finally finishing the "Squid Bridge"

Many years ago, say twenty, I was in a hurry to get the mainline running and enough scenery to host bus tours for the NMRA convention in Seattle coming up in 2004. There was a spot on the mainline between Seattle and Everett just perfect for a low bridge, but I didn't have time to fuss with it, so I just carried the plywood subroadbed and homasote roadbed right across where the bridge would eventually go, and called it good. This is what it looked like during the surrounding scenery construction:


the carved pieces of pink foam did a decent job of simulating the look of concrete piers, and it wasn't long before I painted them a concrete color. I painted the "bridge" black just to hide it as much as possible. After the scenery was "finished", I got the idea to have a giant squid chasing two parents in a rowboat while their kids watched in horror from the shore. People loved it, so we started calling it the "squid bridge". When Paul Scoles was here taking pictures for the RMC article (January 2008 issue) he wanted a large locomotive coming around a dramatic curve, so this is the photo that ended up being published in the article:


He made me take the squid away, but I couldn't believe that he tolerated that completely unfinished bridge in the scene!

Nevertheless, the layout had many other higher priorities over the next ten plus years. At some point I bought some MicroEngineering deck girders to make the bridge out of, and spray-painted them an aluminum paint color. I thought this would get the ball rolling. But it didn't. Those girders junked up the scene for many years, and eventually I got so disgusted that I used them as gondola loads during ops sessions. You can see them ruining the scene here. It also looks like the squid lost its focus on the couple in the rowboat. Not to mention my messing around with dual gage track up in the air above.


Fast forward to 2018. Dave Enger started helping me on the layout, and he suggested that we could just cut out the piece of plywood supporting the bridge, paint the homasote to look like a concrete casting around a ballasted girder bridge, cut the plywood in three angled sections, glue the girders to it, and be done. So we did. Here are some progress photos and final shots to show that this morning, after 20 years, I finally put the guardrails in place over the finished bridge, and get to make a fun redo of Paul's magazine photo.

Abutments and piers:


the giant squid returns:


and, finally, guardrails!


Now, here's a new version of Paul's photo, (without all the photoshop improvements he made to the background etc.). I can see what he meant about the squid being a bit of a distraction. Good call.