Friday, December 29, 2023

Looking back at the goal: 1973 BN


I shot this photo almost accidentally one evening, enjoying the scene of two BN engines randomly lined up in Stacy St. yard. Examining it closer, it does a nice job of summarizing the goal of my current model railroad layout, the "proto-freelanced" Burrlington Northern, Seattle Region, in 1973. At this point in history, about half of the BN's legacy locomotives had been repainted BN green (the last wouldn't be until 1977, an RS3), and intermodal traffic was just starting to be a thing to take seriously.

In this picture, in addition to the two BN green locomotives, we see a string of intermodal flats, some tank cars, a grain car and a MILW woodchip car (most likely about to be interchanged, over in Argo yard). The trailers are from GN, NP and CB&Q, showing their interest in capturing this new intermodal traffic.

There is lots of weathering to do on the rolling stock, but at least the engine sideframes and roofs are dusted up with some pan pastels to make them more visible to both the camera and the naked eye. And the track is ballasted! There are only a few spots left on the layout with unballasted track, one of the past few years' priorities around here. Finally, the backdrop is at least painted, with a rough treeline, but of course it needs something that looks a little more like the Beacon Hill neighborhood that lives behind the Stacy St. yard. Backdrop improvements are definitely a priority for the next several years, in addition to making progress on the West Seattle expansion and, of course, more weathering!

But, looking back on the original goal, I still like it, a group of friends do too, and we are progressing just fine towards it!

Friday, September 29, 2023

Improving N scale operating reliability


N scale model railroading has evolved quite a bit over the years, and I've enjoyed having a living-room 4x8 foot layout since 1980. As I've gotten more interested in operations over the years, I kept having derailments on my mostly Peco switches, which discouraged me considerably, and kept me focused on my basement HO layout. After seeing the benefits of metal wheelsets on my HO layout downstairs (heavier weight, cleaner track) I tried installing some N scale Fox Valley wheelsets, not realizing that they were a narrower tread than required by the older Peco switches. After that made things even worse, I tried the Micro-Trains "metal wheelsets". But they have plastic axles, which would sometimes pop out of the plastic truck sideframes. And the "metal" is coated with a brown coating that looks like it would wear off over time and contaminate the rail head. I went ahead and converted most of my fleet of cars with the MT metal wheels anyway, but still would have derailments. Years went by.

Then a friend let me know that Fox Valley (now a division of ScaleTrains) made a line of "standard" tread metal wheelsets with metal axles, as shown in the picture above. He said that he converted his whole fleet to them and had no derailments, even on older Peco switches. So, I purchased some and tried them out. I noticed that their flange is much narrower than the MT (and Atlas, etc.) flanges, more like the original plastic "pizza-cutter" wheels of old. I think that as a result they really do track better. And their extra weight, low down in the car, from the metal axles, is an extra bonus, too. I think they roll a lot better, too, with the metal axle point in the plastic truck sideframes. I have now converted most of my fleet to these precision-machined wheelsets, and recommend them highly. Just make sure you pay careful attention to three variables when ordering them: the axle length, the width of the tread, and the diameter of the wheel. The ones I'm using on my mostly Micro-Trains cars are 0.540" axles, "Standard Wheels", with 33" diameter, stock number FVM 3310-100.


The other aspect of reliability I'm starting to realize is that with 12" radius curves and a 2% grade on my mainline, longer cars can cause "stringline" derailments on longer trains. I'm reluctantly starting to avoid using the longer cars now, or at least keeping them at the rear end of trains, to avoid those types of derailments. Above is a photo of one such derailment, and you can see that an empty center-beam flatcar, or maybe the long high-center-of-gravity tank car was probably the culprit. If I ever build another N scale layout, I hope to have much broader curve radii, like 18". When I designed this one in 1980, 9" radius was common on N scale layouts and I thought I was being very conservative in using a 12" minimum. Live and learn!

Sunday, August 27, 2023

Ballasting Argo yard - finally!


Model railroad track, to look realistic, needs to have ballast between the ties. It's basically that simple. Unfortunately, the job is somewhat tedious and involves an attention to detail that I am somewhat lacking. In the case of Argo yard, it has remained bare for at least 15 years. Last week Scott, one of my regular operators volunteered to take it on, so we have some progress to report, at last.

I say at last because the yard has been in place and operating for at least ten or 15 years without ballast, waiting for us to "get around to it." Here is a photo of what the right side still looks like, waiting for us to finish the job. I painted some grey between the tracks to give the hint that someday we would get around to it.


Much less realistic, right?

The basic steps are: Paint the track and rails, apply the ballast to the track using a small brush, tap the brush handle on the rails to knock the ballast off the ties, spray with alcohol, apply a 2:1 or 3:1 mix of water and white glue, put a light oil like LaBelle #108 on the switch points and rail joiners, remove any errant pieces off the rail and ties within 8 hours or so, using a toothpick, and remove any glue that might have lingered on the tops of the rails. Polish the rails with a piece of wood and test with a locomotive to make sure everything is OK electrically. That's pretty much it. Here's a final shot of the finished product, showing that I forgot to mention removing and replacing any track labels:


Thanks to Scott for getting this going, and I hope this inspires you to finish any ballasting that you have been procrastinating on. Wait till we get the locos and cars moving on this track!! :)

Thursday, July 27, 2023

The new Universal Wireless Throttles (UWT) from TCS mated with WifiTrax and NCE


Technology keeps evolving, and recently TCS released a line of "Universal Wifi Throttles" that would supposedly work with any DCC system using JMRI protocols, so I had to try them. Shown in the picture above, left to right, is the TCS UWT-50, the UWT-100, the WifiTrax model 31 Wifi signal generator built into an NCE faceplate, and an original NCE "Hammerhead" throttle several decades old. It all seems to work fine. The new throttles are wireless and easy to use, and the only limitation is that the WifiTrax network only supports 4 UWT's operating at the same time (although you can add your home network in for an additional 4). I particularly like that the LCD screens on the new throttles display the functions 0-9 (as opposed to the NCE's 0-6), which is important to me because I have all my locos set to activate the brake function on F9. When a loco doesn't move forward when asked, it's very nice to be able to see that the brake is still on.

The next picture shows the two UTP throttles side by side, for size comparison. The model 50 has a throttle knob (you can get either a potentiometer or encoder version) and the model 100 uses buttons and a thumbwheel similar to the NCE hammerhead. I like both of them a lot. The model 50 also has a button on the side that you can program to be whatever you want, but for example I could make it the brake button.

Finally, on the right is a picture showing that the new throttles easily fit inside the car card boxes that I have spread all over the layout, making them easy to keep track of as you move around the layout. I have found several of my operators have come to prefer these throttles very quickly after they tried them out.

Another great feature of adding the WifiTrax signal generator is that anyone can use their cellphone apps like WiThrottle without you connecting your DCC system to your home wifi system using JMRI. These throttles are sending commands into the NCE throttle bus without me having to set up JMRI myself. Of course, if I did set up JMRI and connect it to the layout, there would be a bunch more advantages, like the throttles would provide a readout of which function buttons control which functions, but that is for another day (month?). For now, I just wanted to quickly document that these throttles work and are already being used a lot. The new TCS DCC base station is also a very interesting new product, but I don't have one (yet) so I won't say anything more at this point. Stay tuned, though. If it works with my existing NCE throttles and boosters I might become interested...

Thursday, April 27, 2023

NCE's 2021 firmware upgrade & BN C636

I just read in the May issue of the NMRA.org magazine that NCE released a chip with new firmware on it for their Powerhouse Pro (PHP) DCC command stations. I don't know how that information escaped me previously, but I immediately ordered one and just finished installing it in my PHP. I don't have any pictures to show of it, but am glad to have it done. One benefit is a quicker response on the CAB06 throttles. Another is you can deactivate the "momentum" button on the Procabs, which reduces mischief during operating sessions.

The other big news this week is Brian Elchlepp brought over two of my BN Alco 636's that he batch-weathered along with one of his. Here's a picture of THAT! :)


Wednesday, April 12, 2023

Upgrading the passenger E-unit fleet

I've never been a big fan of the E-units for some reason. I think it is the three axle trucks with the center axle unpowered. It seems so wrong to have an unpowered axle on a locomotive. There may have been good reasons for it, though. But the truth is that E units were the innovation that replaced steam locomotives on most passenger trains during the steam-to-diesel transition era. At least in the flatlands, where the lack of a powered axle didn't matter.

Anyway, I never bought an E unit in my life for model railroading purposes. But a few years ago my friend brought over a couple of his GN E units and let me borrow them for my passenger consists. So we naively put them on the "Empire Builder" train and ran it in to Seattle from "Chicago" (well, Skykomish). There are plenty of my YouTube videos out there with the Empire Builder speeding through that show these E units in action.


But more research found that the E units weren't used on the mountain grades - they used F units instead (with all axles powered, like I said). Out west here, they only used the E units on flat runs such as the International between Seattle and Vancouver BC. Oops.

Then, Rapido came out with E units painted for both Amtrak and CB&Q, and another friend came up with pictures proving that the CB&Q units were sometimes used out here on Amtrak's version of the International in the early BN days. Also, the GN gave up their E units before the BN merger even happened! So, what could I do but purchase the Rapido units and return the GN units to their owner?

We had grown fond of those GN units, though, so we decided to stage a goodbye ceremony to have the new shiny CB&Q E unit and some other engines escort the GN E units around the layout one final time. This grand event was captured on video and posted here. We hope you enjoy it.

The next time the International heads south from Vancouver BC, it's going to stop at the roundhouse in Everett for a locomotive change, so we can justify both of the new E units! And look for them in future videos, too. :)

Monday, February 20, 2023

A new crossover south of Argo yard


You can see a curved crossover in the lower part of this photo. The one with the flashlight shining on it is the one I finally just installed at the very south end of the layout, south of Argo yard. Let's unpack this photo and all these tracks. From bottom to top, in the street are the tracks to Lonestar Cement and the South Seattle Intermodal Terminal (truck trailers strewn all over for the installation of the turnout). Above that is what looks like a double track curved mainline with a (new, the subject of this post!) crossover in the middle of it. But appearances can be deceiving - the closer track to the right curves around in a reverse loop that eventually becomes the "Colorado Main" leading back to the Stacy St. yard. The farther mainline track heads into the hidden staging yard of 7 tracks representing Tacoma and Portland off the layout to the south. Heading off to the left, the nearer track is "Main 1" leading to Stacy St. yard, Seattle and northward, and the farther main track is "Main 2" which has the lead to the Argo yard and parallels Main 1 around the layout to the left (north) as far as Mukilteo.

Above Main 1 and Main 2 is the mainline between Everett and Mount Vernon to the north. Above that in the shadows is the Woodinville Branch (I forgot to turn its lights on, oops.). Above that, on the upper border of the photo, is the edge of the Skykomish staging yard, at the far easternmost point on the layout.

Well, I had to install this crossover once we built the "Black River Jct. yard" above Harbor Island (Legotown) because we needed to connect Argo yard to the reverse loop, in order to run trains "south" from Argo to BRJ. I procrastinated on this for months, if not years, but now it's done. Hurrah!

The next two pictures show track-level views of the crossover during glueing. I pin down the tracks and then drip liquid latex diluted 3:1 with water for attaching tracks. Then later when I put down ballast, the water-based white glue doesn't unglue the latex, which has dried by that time and is impervious to water. That's the good news. The bad news is that I've found that liquid latex deteriorates after 20 years or so (just like a rubber band does) so there are places I have had to re-do over time. I usually put weights on the track during glueing, too, but for some reason I hadn't done this when I took these photos.


So, here is a photo of the track with the weights on it...


And, finally, here is the new crossover after it passed the testing phase, with the trailers back in place and everything ready to go. (In case you were wondering, those white triangles are markers we use for measuring the length of trains entering each of the hidden staging tracks in the Tacoma staging yard off to the right.) It doesn't seem like much, but this crossover is an important key to the future operation of Argo yard, the Lonestar Cement switching area, and the new Black River Jct. yard. It's great to finally have it in operation!


Friday, February 10, 2023

Adding "just one more" caboose to the roster


One of the advantages of, if not the point of, modeling the BN in 1973 is that you need a caboose on almost every train. So, in addition to hundreds of different models and paint schemes of locomotives to collect, there are a lot of caboose variations. I started out collecting your basic Athearn and Atlas models and pretty soon I had more than enough cabooses (not to mention staging tracks) to run a typical day's worth of 15 or so trains. So I thought I was done. But then I started finding out about brass caboose models being a thing, and started collecting them from random swap meets and retailers. So my caboose fleet doubled and I had accumulated way more than more than enough. One project finished! (like, 30, which really seems like enough!)

But you know where this is going. Last year Division Point decided to import a run of the ex-GN X-1 series cabooses, some of the weirdest-looking cabooses ever, and to make some in BN paint!! I already had an older brass model of GN X-1 in bright red paint, but this just seemed too good to pass up. So, now I am officially finished collecting cabooses. For the second or third time. The picture above shows how good (and unusual) it looks, and I also posted a couple of short videos of it here and here.

There's only one caboose model that I still don't have and really want to, which is that NP one with the super-high straight cupola. I've seen unpainted brass models of it but never one decorated for BN, even though I know that some of them survived post-merger. If you see one of those, get it for me or let me know about it. Otherwise, I'm DONE.

Thursday, January 26, 2023

Getting JMRI running again (YAY!)

It's hard to explain how difficult it is to install JMRI (https://jmri.org) and keep it running over an extended period of years. The good news is that it exists, is free, and keeps getting updated with data on all the new decoders that manufacturers produce, as well as many other amazing features and uses. For example, you can now use it to create a web-based throttle with a cab video image live, for someone to run your layout from anywhere in the world! (assuming you can master all of the technology involved, which I have yet to do!).

The bad news is that it takes a lot of overhead care and feeding just to keep all the "user files" connected to the "program files" as you and JMRI update your computers, operating systems and versions over time. A lot. I am always in a hurry to get things done, which makes things much worse, because one dumb mistake on my part and my JMRI is crashed for months.

It would be easy to say "get a spare computer, load JMRI on it, unplug it from the internet, and use it only on your railroad for the rest of your life." I know some people have done that. However, I like to keep buying locomotives and setting up their decoders consistently with the rest of my fleet, so I need to keep upgrading to the latest version of JMRI, which means keeping my computer's operating system up to date and whatever version of Java that the latest version needs. If I understood any of this, it would be one thing, but I don't.

A year ago, my beloved computer program for making car cards, "Waybills" by Shenware, which doesn't have a version for Mac iOS, crashed on my "PC emulator" that I was running on my Mac. Without going into details on the ensuing nightmare, I ended up buying both a new PC and a new Mac. Thinking that I would keep the PC in the basement with the train layout and the Mac in my office. In the end, I was only partly able to get Shenware running properly on the new PC, and the company is no longer supporting its product, so I'm not likely to ever get it fully functioning again. Very bad news. But then I turned to the idea of putting my "user files" from JMRI on Dropbox so that I could run JMRI both from the basement and from my upstairs Mac. I tried this, in a big hurry as usual, and the result was that both installations of JMRI crashed. So this left me without both my beloved car card program and Decoder Pro or any of my dispatcher panels on PanelPro or operations scenarios in OperationsPro (all very useful features of JMRI).

So I stopped having op sessions of any size and turned my time and attention to layout construction and making YouTube videos (which hopefully you are enjoying at https://Youtube.com/@muchfunwithtrains) , hoping that some day I would get JMRI working again.

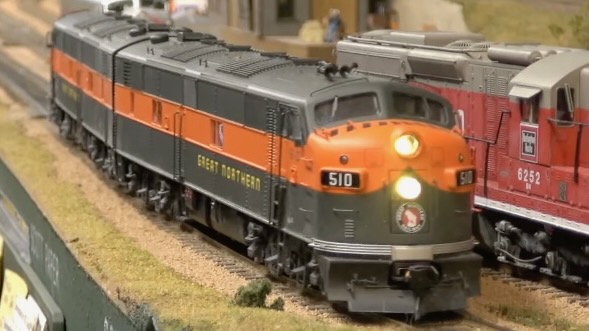
Well, today it happened! I can't explain any of it, but I tried opening JMRI on my Mac and it worked! It found the latest version of Java that I had previously installed, and it was able, with a little prodding, to find my locomotive roster data. The following photo is proof. I just installed a new loco, SP&S RS-3 #90 in the JMRI for my HO layout. I haven't tried looking for the panels in PanelPro yet, and have no confidence at all that I will find them, but at least I can get back to working on locos using DecoderPro.


Just a note on Dropbox. After using it for a few years for various file transfers and such, I finally realized that I had not one, but three emails associated with Dropbox files that my computers were using. It is next to impossible to figure this out, or what to do about it. I haven't tackled that yet, but I'm only going to try sharing JMRI between my two computers after I somehow straighten that mess out. In the meantime, I'll probably just move my Mac downstairs and plug it in to the layout for operating sessions. A shame, but I don't want my hobby to become "computer technician" any more than it already has.

Monday, January 16, 2023

Experimenting with a better video camera


"Serious" model railroad operations are a lot of fun, but if you have a continuous loop option on a model railroad, you can have a different kind of fun, where trains chase each other around the mainline and the amount of effort to avoid collisions is less, although still non-zero, depending on the skill and attention span of those driving the trains. A few days ago some friends brought their new locos over for some testing, and yes, we ended up chasing trains around the room. Another friend brought a fancy video camera to try, so the result is now posted on Youtube as "Part 50" here: https://youtu.be/naOXc_DObGY 

I do have a more serious video in production, about how to turn the "Pacific Zip" intermodal train when it arrives in Seattle, but that will take some more editing time.

When I started making model railroad operations videos a few years ago, and then started numbering them in a series, I had no idea how quickly I would get up to having a part 50. Making videos has become another major sub-hobby, and I'll be giving a couple of clinics about it this spring, one at the NMRA Pacific Northwest Region (PNR) conference in Tacoma on May 11, and another at the Railway Modelers Meet of British Columbia on May 28. Except for the most recent one, they were all done with just an iPhone and sometimes a GoPro or cheap spycam.

Meanwhile, here's a photo of some switching action that took place even while the trains were chasing each other around the room on the mainline: