Tuesday, June 9, 2026

Squealers


This video, shows the components of the ISE "Squealers" that I've been adding to the layout lately. They have a motion-detecting sensor between the ties and make a very realistic wheel flange sqealing noise whenever a car or engine triggers it. And when the train stops, the sound stops, just like a real train. I've had several of them in operation for several years now, and am installing 5 more soon. It really adds to the realism of operations. I've also had great experience with the staff of ISE, who are very responsive to any questions and issues.

The photo above is a rare view of inside the tunnel between the Everett Bayside yard and the Delta Wye. I'm planning to put a Squealer in there to give yardmasters a heads up that a train is coming their way inside the tunnel. The weights are on the track because I had to re-glue the track down after drilling the hole from underneath to install the sensor in. Oh, well...                 

Sunday, April 26, 2026

Car card and waybill essay, with examples

 A friend recently asked for "my thoughts about making waybills" to insert in car cards. I wrote him a long reply, and I've reprinted it here, in case it's useful:

The main thing is to do it gradually, one at a time. I've been really surprised at how long it takes me to do a good waybill. I always think I can bang some out in 10 minutes, and 45 minutes later, I'm still at it.

I'm using a PC program called "Shenware" to print my waybills, but Todd VonStup likes "SwitchIt" and Bill Sornsin does them on an Excel spreadsheet that he got from someone. There's nothing wrong with handwriting the MicroMark ones, either. I've done a lot of that. Of course, Tony Thompson's blog is full of how to make your waybills more "realistic", and I used his template to make a few up, and they are cool, too, but I haven't gotten around to doing more of them. It's a whole sub-hobby, I guess you could say. (BTW, I heard that Shenware was sold to MRH, but I haven't heard if they plan to release it again. I don't believe it's currently available)

So, just for starters, let's jump into these three photos for a minute.


Burr's waybills, photo 1


Photo 1 is the only photo that shows both sides of one of these 4-cycle waybills. But there are lots of my waybills printed on one side only and used simply as out-and-back "captive" moves. Especially for my cement hoppers - they just move loaded from Lonestar out to somewhere and then back in again empty. You could do that with your whole railroad and nobody would notice. So these first two images for an auto-rack (FA in the upper left-hand corner) show it moving to Pier 91's "autorack loading" (SPINS 128101 (Interbay is zone 12, Pier 91 is track 81, and the first spot on that track is 01, hence SPINS 128101)(note that this is triple information redundancy - the top of the waybill color is white, meaning it goes to Interbay, the text says Autorack loading, and the SPINS number is the specific location, if you want to have your brain work like an early computer).

Where was I? Oh, so I was being clever and wanted to split the auto business fairly between GM and Ford, so I have cycle one coming in from Pittsburgh with autos, cycle two going back to Pittsburgh, cycle coming back in from Ford in Detroit, and cycle 4 going back to Detroit. Three problems with this. (1) I was in such a hurry I didn't pay any attention to the fact that Pittsburgh was the body stamping plant, not the final assembly plant (as far as I know), so that waybill cycle should be on an auto-parts boxcar to an assembly plant in Seattle, which there wasn't one of, (2) Pier 91 was actually a Datsun importing operation, not a receiving yard for autos from Detroit, so the westbound cars should be empty and eastbound loaded, and (3) unloading and re-loading HO scale autos from an open auto-rack car is, believe me, something you only do once or twice, so you really need your waybills to keep the darn things either empty or loaded, which this waybill does not do. The third waybill in this photo is a regular bulkhead flat (FB) two-cycle waybill moving lumber to LA and back empty to BC. I have a lot of these, and lumber loads are easy to put on and off, and look great.

Burr's waybills, photo 2


Photo 2 starts with a similar FB (bulkhead flatcar) waybill which easily could be the back side of the previous one (in photo 1). This way my FB's alternate between heading south or heading east, creating some variety in moves. Then there is the FL (log bunk) loaded with logs from the CW (Chehalis Western RR) heading to Everett's Mill B (if that ever happened, which I doubt), and then on up to the Darrington Branch for more logs, which also come back loaded (on the other side of the waybill) to Mill B. The third waybill illustrates something I do a lot, which is to have cycle one be an empty car order from "anywhere", in this case then headed to Ballard, and cycle two sends it to California loaded with cement. The nice thing about starting out with an empty car order from anywhere, is when you are restaging the layout after operations, if you find a car in the wrong place, instead of moving it, you can flip the waybill back to the "from anywhere" cycle and the next crew will get it going to the right place.

This brings up an important point. Randomness. Paul Scoles set up his waybills and op sessions to complete a single cycle for all cars. Meaning that at the beginning of the session all waybills were on cycle 1, say, and at the end of the session all cars had been delivered. Then he would flip all the waybills on the layout, and the next op session would start out with all cars on cycle 2. He thought this was terrific, because if anyone knocked their car cards on the floor by accident, it would be easy enough to pick them up and put the waybills back in the pocket on the correct cycle. However, I didn't want to do it that way. Each car moves toward its destination via a series of switching moves and trains, and when a particular car reaches its final destination depends on how many operators are available for a particular op session, and many other factors. If somebody spills their car cards on the floor, so be it. The train itself should always be in blocking order, so it shouldn't be too hard to put the deck back together. I can have an op session by myself, or with 16 operators, or anything in between. When the cars reach their destination, we can leave them there until the next session. Or longer. Eventually we flip the waybills. It's random, and feels pretty realistic.

Burr's waybills, photo 3


OK, back to the last photo, number 3. The TA (tank car) waybill shows some shippers that I got from the OPSIG database, or maybe from one of the "Rails Unlimited" Shippers Guides that he sells online, and it makes me happy that it "could have" been a real move. But nobody else cares. All they want to know is where the damn thing goes on the layout. Eastbound staging? Southbound? Which train should it be in? The layout owner is the only one analyzing if the moves are realistic.

On the real BN, there were trains to Portland that interchanged with the SP (Southern Pacific), and trains to Wishram that went on the Inside Gateway to the Santa Fe. Very different set of waybills, right? But, unlike Bill Sornsin, I don't have enough room in my Interbay and Stacy St yards to make up two different southbound trains. Sad, but true. So, all the southbound waybills show the red south staging color, and nobody cares about the two totally different manifests that took place on the prototype. Maybe if you were here, being the Stacy St. yardmaster, you would get a kick out of re-blocking all the red waybilled cars to the two different trains, but more likely you would be too busy with everything else going on there to enjoy that.

OK, back to the last photo, number 3. The FB waybill illustrates a couple of things. One is the empty car order, as we already discussed. The second is the light blue second bar on cycle 2, showing that I'm trying to get this car routed on the "Fern Turn" train instead of any other northbound train that would normally pick up a blue waybilled car like this. (This hasn't really worked. Visiting operators and just too busy with first-level sorting, and, again, there aren't really enough tracks available, to keep track of which train to put cars on, beyond the obvious bold color schemes. But, I'm not giving up on this. I'm thinking about putting the name of the train type on each waybill, to help future yardmasters do their job. But it may or may not help. We'll see.) The FM waybill shows my approach to interchanging to the UP (Union Pacific). In this case, I have a Seattle lumberyard that was only served by UP switchers as a destination, so the car needs to be interchanged to the UP at Argo. But since the destination is Seattle, it won't go off to staging on a UP southbound train to Black River Jct. It will just stay in Argo and have its waybill flipped at the next session. Also note that it is supposed to be weighed. Right. I have a cool electronic weigh station at Stacy St. on yard track 8, right in front. It's been used twice, that I know of. It would be an unusual visiting yardmaster who would have any idea of what they were doing in that yard, let alone weighing a car and writing down the weight in that space provided on the waybill. Like I said, it has happened twice. Cool, though. Also note, on cycle 1 it shows a comment "UP car". So I can try to have UP cars get used for shipping to UP destinations.

That's a start on my ideas about waybills. I hope you find it worth reading! Just write out a few waybills and try switching with them, and see how it goes. I had hundreds of hand-written waybills in service long before I ever changed over to a computer-based system.

(If you look at the OPSIG YouTube channel, Eric Smith has a video on how to use "car order" card systems for car forwarding, which you might enjoy considering. I set it up for my N scale layout and am trying it out. There aren't car cards, only car order cards, and those car order cards stay at each town, rather than moving with the train. It basically keeps track of which types of cars should be spotted or pulled at each industry spot, without caring about the reporting marks. Ideal for N scale, so you don't have to read car numbers.)

One last thing. On the prototype, at the local level, inbound loads are handled differently than outbound loads. For outbound loads, an empty car order brings a car to a shipper (cycle 1), and the loaded car goes far away (cycle 2). Done. For inbound loads, the car comes in from far away and gets spotted at the local shipper (cycle 1), and then it gets picked up and stored empty at a local yard until further notice (cycle 2). Eventually it gets an empty car order and either gets sent to a local shipper for loading (cycle 3) and then sent loaded to an offline shipper (cycle 4), or sent offline right away to a distant shipper (cycle 3). So, I have a variety of 2, 3 and 4 cycle waybills, accordingly. What I've found in practice, though, is that I don't have enough room in any of the yards to afford an "empty car track" for a lot of empty cars to be just hanging around. So when re-staging I tend to advance the waybills calling for local storage on an empty car track by two waybill cycles and get them back out to staging. Another example of the "unintended consequences of trying to imitate the prototype too faithfully." (That would make a great clinic!).


Friday, December 29, 2023

Looking back at the goal: 1973 BN


I shot this photo almost accidentally one evening, enjoying the scene of two BN engines randomly lined up in Stacy St. yard. Examining it closer, it does a nice job of summarizing the goal of my current model railroad layout, the "proto-freelanced" Burrlington Northern, Seattle Region, in 1973. At this point in history, about half of the BN's legacy locomotives had been repainted BN green (the last wouldn't be until 1977, an RS3), and intermodal traffic was just starting to be a thing to take seriously.

In this picture, in addition to the two BN green locomotives, we see a string of intermodal flats, some tank cars, a grain car and a MILW woodchip car (most likely about to be interchanged, over in Argo yard). The trailers are from GN, NP and CB&Q, showing their interest in capturing this new intermodal traffic.

There is lots of weathering to do on the rolling stock, but at least the engine sideframes and roofs are dusted up with some pan pastels to make them more visible to both the camera and the naked eye. And the track is ballasted! There are only a few spots left on the layout with unballasted track, one of the past few years' priorities around here. Finally, the backdrop is at least painted, with a rough treeline, but of course it needs something that looks a little more like the Beacon Hill neighborhood that lives behind the Stacy St. yard. Backdrop improvements are definitely a priority for the next several years, in addition to making progress on the West Seattle expansion and, of course, more weathering!

But, looking back on the original goal, I still like it, a group of friends do too, and we are progressing just fine towards it!

Friday, September 29, 2023

Improving N scale operating reliability


N scale model railroading has evolved quite a bit over the years, and I've enjoyed having a living-room 4x8 foot layout since 1980. As I've gotten more interested in operations over the years, I kept having derailments on my mostly Peco switches, which discouraged me considerably, and kept me focused on my basement HO layout. After seeing the benefits of metal wheelsets on my HO layout downstairs (heavier weight, cleaner track) I tried installing some N scale Fox Valley wheelsets, not realizing that they were a narrower tread than required by the older Peco switches. After that made things even worse, I tried the Micro-Trains "metal wheelsets". But they have plastic axles, which would sometimes pop out of the plastic truck sideframes. And the "metal" is coated with a brown coating that looks like it would wear off over time and contaminate the rail head. I went ahead and converted most of my fleet of cars with the MT metal wheels anyway, but still would have derailments. Years went by.

Then a friend let me know that Fox Valley (now a division of ScaleTrains) made a line of "standard" tread metal wheelsets with metal axles, as shown in the picture above. He said that he converted his whole fleet to them and had no derailments, even on older Peco switches. So, I purchased some and tried them out. I noticed that their flange is much narrower than the MT (and Atlas, etc.) flanges, more like the original plastic "pizza-cutter" wheels of old. I think that as a result they really do track better. And their extra weight, low down in the car, from the metal axles, is an extra bonus, too. I think they roll a lot better, too, with the metal axle point in the plastic truck sideframes. I have now converted most of my fleet to these precision-machined wheelsets, and recommend them highly. Just make sure you pay careful attention to three variables when ordering them: the axle length, the width of the tread, and the diameter of the wheel. The ones I'm using on my mostly Micro-Trains cars are 0.540" axles, "Standard Wheels", with 33" diameter, stock number FVM 3310-100.


The other aspect of reliability I'm starting to realize is that with 12" radius curves and a 2% grade on my mainline, longer cars can cause "stringline" derailments on longer trains. I'm reluctantly starting to avoid using the longer cars now, or at least keeping them at the rear end of trains, to avoid those types of derailments. Above is a photo of one such derailment, and you can see that an empty center-beam flatcar, or maybe the long high-center-of-gravity tank car was probably the culprit. If I ever build another N scale layout, I hope to have much broader curve radii, like 18". When I designed this one in 1980, 9" radius was common on N scale layouts and I thought I was being very conservative in using a 12" minimum. Live and learn!

Sunday, August 27, 2023

Ballasting Argo yard - finally!


Model railroad track, to look realistic, needs to have ballast between the ties. It's basically that simple. Unfortunately, the job is somewhat tedious and involves an attention to detail that I am somewhat lacking. In the case of Argo yard, it has remained bare for at least 15 years. Last week Scott, one of my regular operators volunteered to take it on, so we have some progress to report, at last.

I say at last because the yard has been in place and operating for at least ten or 15 years without ballast, waiting for us to "get around to it." Here is a photo of what the right side still looks like, waiting for us to finish the job. I painted some grey between the tracks to give the hint that someday we would get around to it.


Much less realistic, right?

The basic steps are: Paint the track and rails, apply the ballast to the track using a small brush, tap the brush handle on the rails to knock the ballast off the ties, spray with alcohol, apply a 2:1 or 3:1 mix of water and white glue, put a light oil like LaBelle #108 on the switch points and rail joiners, remove any errant pieces off the rail and ties within 8 hours or so, using a toothpick, and remove any glue that might have lingered on the tops of the rails. Polish the rails with a piece of wood and test with a locomotive to make sure everything is OK electrically. That's pretty much it. Here's a final shot of the finished product, showing that I forgot to mention removing and replacing any track labels:


Thanks to Scott for getting this going, and I hope this inspires you to finish any ballasting that you have been procrastinating on. Wait till we get the locos and cars moving on this track!! :)

Thursday, July 27, 2023

The new Universal Wireless Throttles (UWT) from TCS mated with WifiTrax and NCE


Technology keeps evolving, and recently TCS released a line of "Universal Wifi Throttles" that would supposedly work with any DCC system using JMRI protocols, so I had to try them. Shown in the picture above, left to right, is the TCS UWT-50, the UWT-100, the WifiTrax model 31 Wifi signal generator built into an NCE faceplate, and an original NCE "Hammerhead" throttle several decades old. It all seems to work fine. The new throttles are wireless and easy to use, and the only limitation is that the WifiTrax network only supports 4 UWT's operating at the same time (although you can add your home network in for an additional 4). I particularly like that the LCD screens on the new throttles display the functions 0-9 (as opposed to the NCE's 0-6), which is important to me because I have all my locos set to activate the brake function on F9. When a loco doesn't move forward when asked, it's very nice to be able to see that the brake is still on.

The next picture shows the two UTP throttles side by side, for size comparison. The model 50 has a throttle knob (you can get either a potentiometer or encoder version) and the model 100 uses buttons and a thumbwheel similar to the NCE hammerhead. I like both of them a lot. The model 50 also has a button on the side that you can program to be whatever you want, but for example I could make it the brake button.

Finally, on the right is a picture showing that the new throttles easily fit inside the car card boxes that I have spread all over the layout, making them easy to keep track of as you move around the layout. I have found several of my operators have come to prefer these throttles very quickly after they tried them out.

Another great feature of adding the WifiTrax signal generator is that anyone can use their cellphone apps like WiThrottle without you connecting your DCC system to your home wifi system using JMRI. These throttles are sending commands into the NCE throttle bus without me having to set up JMRI myself. Of course, if I did set up JMRI and connect it to the layout, there would be a bunch more advantages, like the throttles would provide a readout of which function buttons control which functions, but that is for another day (month?). For now, I just wanted to quickly document that these throttles work and are already being used a lot. The new TCS DCC base station is also a very interesting new product, but I don't have one (yet) so I won't say anything more at this point. Stay tuned, though. If it works with my existing NCE throttles and boosters I might become interested...

Thursday, April 27, 2023

NCE's 2021 firmware upgrade & BN C636

I just read in the May issue of the NMRA.org magazine that NCE released a chip with new firmware on it for their Powerhouse Pro (PHP) DCC command stations. I don't know how that information escaped me previously, but I immediately ordered one and just finished installing it in my PHP. I don't have any pictures to show of it, but am glad to have it done. One benefit is a quicker response on the CAB06 throttles. Another is you can deactivate the "momentum" button on the Procabs, which reduces mischief during operating sessions.

The other big news this week is Brian Elchlepp brought over two of my BN Alco 636's that he batch-weathered along with one of his. Here's a picture of THAT! :)


Wednesday, April 12, 2023

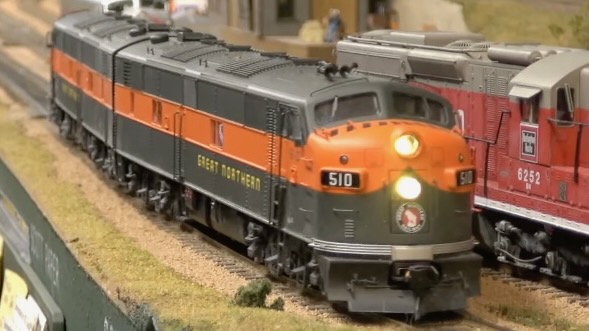
Upgrading the passenger E-unit fleet

I've never been a big fan of the E-units for some reason. I think it is the three axle trucks with the center axle unpowered. It seems so wrong to have an unpowered axle on a locomotive. There may have been good reasons for it, though. But the truth is that E units were the innovation that replaced steam locomotives on most passenger trains during the steam-to-diesel transition era. At least in the flatlands, where the lack of a powered axle didn't matter.

Anyway, I never bought an E unit in my life for model railroading purposes. But a few years ago my friend brought over a couple of his GN E units and let me borrow them for my passenger consists. So we naively put them on the "Empire Builder" train and ran it in to Seattle from "Chicago" (well, Skykomish). There are plenty of my YouTube videos out there with the Empire Builder speeding through that show these E units in action.


But more research found that the E units weren't used on the mountain grades - they used F units instead (with all axles powered, like I said). Out west here, they only used the E units on flat runs such as the International between Seattle and Vancouver BC. Oops.

Then, Rapido came out with E units painted for both Amtrak and CB&Q, and another friend came up with pictures proving that the CB&Q units were sometimes used out here on Amtrak's version of the International in the early BN days. Also, the GN gave up their E units before the BN merger even happened! So, what could I do but purchase the Rapido units and return the GN units to their owner?

We had grown fond of those GN units, though, so we decided to stage a goodbye ceremony to have the new shiny CB&Q E unit and some other engines escort the GN E units around the layout one final time. This grand event was captured on video and posted here. We hope you enjoy it.

The next time the International heads south from Vancouver BC, it's going to stop at the roundhouse in Everett for a locomotive change, so we can justify both of the new E units! And look for them in future videos, too. :)

Monday, February 20, 2023

A new crossover south of Argo yard


You can see a curved crossover in the lower part of this photo. The one with the flashlight shining on it is the one I finally just installed at the very south end of the layout, south of Argo yard. Let's unpack this photo and all these tracks. From bottom to top, in the street are the tracks to Lonestar Cement and the South Seattle Intermodal Terminal (truck trailers strewn all over for the installation of the turnout). Above that is what looks like a double track curved mainline with a (new, the subject of this post!) crossover in the middle of it. But appearances can be deceiving - the closer track to the right curves around in a reverse loop that eventually becomes the "Colorado Main" leading back to the Stacy St. yard. The farther mainline track heads into the hidden staging yard of 7 tracks representing Tacoma and Portland off the layout to the south. Heading off to the left, the nearer track is "Main 1" leading to Stacy St. yard, Seattle and northward, and the farther main track is "Main 2" which has the lead to the Argo yard and parallels Main 1 around the layout to the left (north) as far as Mukilteo.

Above Main 1 and Main 2 is the mainline between Everett and Mount Vernon to the north. Above that in the shadows is the Woodinville Branch (I forgot to turn its lights on, oops.). Above that, on the upper border of the photo, is the edge of the Skykomish staging yard, at the far easternmost point on the layout.

Well, I had to install this crossover once we built the "Black River Jct. yard" above Harbor Island (Legotown) because we needed to connect Argo yard to the reverse loop, in order to run trains "south" from Argo to BRJ. I procrastinated on this for months, if not years, but now it's done. Hurrah!

The next two pictures show track-level views of the crossover during glueing. I pin down the tracks and then drip liquid latex diluted 3:1 with water for attaching tracks. Then later when I put down ballast, the water-based white glue doesn't unglue the latex, which has dried by that time and is impervious to water. That's the good news. The bad news is that I've found that liquid latex deteriorates after 20 years or so (just like a rubber band does) so there are places I have had to re-do over time. I usually put weights on the track during glueing, too, but for some reason I hadn't done this when I took these photos.


So, here is a photo of the track with the weights on it...


And, finally, here is the new crossover after it passed the testing phase, with the trailers back in place and everything ready to go. (In case you were wondering, those white triangles are markers we use for measuring the length of trains entering each of the hidden staging tracks in the Tacoma staging yard off to the right.) It doesn't seem like much, but this crossover is an important key to the future operation of Argo yard, the Lonestar Cement switching area, and the new Black River Jct. yard. It's great to finally have it in operation!


Friday, February 10, 2023

Adding "just one more" caboose to the roster


One of the advantages of, if not the point of, modeling the BN in 1973 is that you need a caboose on almost every train. So, in addition to hundreds of different models and paint schemes of locomotives to collect, there are a lot of caboose variations. I started out collecting your basic Athearn and Atlas models and pretty soon I had more than enough cabooses (not to mention staging tracks) to run a typical day's worth of 15 or so trains. So I thought I was done. But then I started finding out about brass caboose models being a thing, and started collecting them from random swap meets and retailers. So my caboose fleet doubled and I had accumulated way more than more than enough. One project finished! (like, 30, which really seems like enough!)

But you know where this is going. Last year Division Point decided to import a run of the ex-GN X-1 series cabooses, some of the weirdest-looking cabooses ever, and to make some in BN paint!! I already had an older brass model of GN X-1 in bright red paint, but this just seemed too good to pass up. So, now I am officially finished collecting cabooses. For the second or third time. The picture above shows how good (and unusual) it looks, and I also posted a couple of short videos of it here and here.

There's only one caboose model that I still don't have and really want to, which is that NP one with the super-high straight cupola. I've seen unpainted brass models of it but never one decorated for BN, even though I know that some of them survived post-merger. If you see one of those, get it for me or let me know about it. Otherwise, I'm DONE.

Thursday, January 26, 2023

Getting JMRI running again (YAY!)

It's hard to explain how difficult it is to install JMRI (https://jmri.org) and keep it running over an extended period of years. The good news is that it exists, is free, and keeps getting updated with data on all the new decoders that manufacturers produce, as well as many other amazing features and uses. For example, you can now use it to create a web-based throttle with a cab video image live, for someone to run your layout from anywhere in the world! (assuming you can master all of the technology involved, which I have yet to do!).

The bad news is that it takes a lot of overhead care and feeding just to keep all the "user files" connected to the "program files" as you and JMRI update your computers, operating systems and versions over time. A lot. I am always in a hurry to get things done, which makes things much worse, because one dumb mistake on my part and my JMRI is crashed for months.

It would be easy to say "get a spare computer, load JMRI on it, unplug it from the internet, and use it only on your railroad for the rest of your life." I know some people have done that. However, I like to keep buying locomotives and setting up their decoders consistently with the rest of my fleet, so I need to keep upgrading to the latest version of JMRI, which means keeping my computer's operating system up to date and whatever version of Java that the latest version needs. If I understood any of this, it would be one thing, but I don't.

A year ago, my beloved computer program for making car cards, "Waybills" by Shenware, which doesn't have a version for Mac iOS, crashed on my "PC emulator" that I was running on my Mac. Without going into details on the ensuing nightmare, I ended up buying both a new PC and a new Mac. Thinking that I would keep the PC in the basement with the train layout and the Mac in my office. In the end, I was only partly able to get Shenware running properly on the new PC, and the company is no longer supporting its product, so I'm not likely to ever get it fully functioning again. Very bad news. But then I turned to the idea of putting my "user files" from JMRI on Dropbox so that I could run JMRI both from the basement and from my upstairs Mac. I tried this, in a big hurry as usual, and the result was that both installations of JMRI crashed. So this left me without both my beloved car card program and Decoder Pro or any of my dispatcher panels on PanelPro or operations scenarios in OperationsPro (all very useful features of JMRI).

So I stopped having op sessions of any size and turned my time and attention to layout construction and making YouTube videos (which hopefully you are enjoying at https://Youtube.com/@muchfunwithtrains) , hoping that some day I would get JMRI working again.

Well, today it happened! I can't explain any of it, but I tried opening JMRI on my Mac and it worked! It found the latest version of Java that I had previously installed, and it was able, with a little prodding, to find my locomotive roster data. The following photo is proof. I just installed a new loco, SP&S RS-3 #90 in the JMRI for my HO layout. I haven't tried looking for the panels in PanelPro yet, and have no confidence at all that I will find them, but at least I can get back to working on locos using DecoderPro.


Just a note on Dropbox. After using it for a few years for various file transfers and such, I finally realized that I had not one, but three emails associated with Dropbox files that my computers were using. It is next to impossible to figure this out, or what to do about it. I haven't tackled that yet, but I'm only going to try sharing JMRI between my two computers after I somehow straighten that mess out. In the meantime, I'll probably just move my Mac downstairs and plug it in to the layout for operating sessions. A shame, but I don't want my hobby to become "computer technician" any more than it already has.

Monday, January 16, 2023

Experimenting with a better video camera


"Serious" model railroad operations are a lot of fun, but if you have a continuous loop option on a model railroad, you can have a different kind of fun, where trains chase each other around the mainline and the amount of effort to avoid collisions is less, although still non-zero, depending on the skill and attention span of those driving the trains. A few days ago some friends brought their new locos over for some testing, and yes, we ended up chasing trains around the room. Another friend brought a fancy video camera to try, so the result is now posted on Youtube as "Part 50" here: https://youtu.be/naOXc_DObGY 

I do have a more serious video in production, about how to turn the "Pacific Zip" intermodal train when it arrives in Seattle, but that will take some more editing time.

When I started making model railroad operations videos a few years ago, and then started numbering them in a series, I had no idea how quickly I would get up to having a part 50. Making videos has become another major sub-hobby, and I'll be giving a couple of clinics about it this spring, one at the NMRA Pacific Northwest Region (PNR) conference in Tacoma on May 11, and another at the Railway Modelers Meet of British Columbia on May 28. Except for the most recent one, they were all done with just an iPhone and sometimes a GoPro or cheap spycam.

Meanwhile, here's a photo of some switching action that took place even while the trains were chasing each other around the room on the mainline:


Friday, December 2, 2022

Demolishing a workbench to make three work stations


Sometimes you have to demolish before you can construct. When we moved into this house I needed to tear down three walls in the basement to clear the way for the model railroad to come. But I neglected to tear down an old bulky solid-as-a rock workbench/shelf unit that the previous owner had built there. After thirty years of thinking about it, last week we got out the hammers and other deconstruction tools and tore the thing apart. There was no way to imagine hauling it up the basement stairs, even though some other homeowner might have found it useful.

What I realized in the intervening thirty years is that model railroading is both an art and a manufacturing plant. We need a work station for electronics like DCC decoders, servos and LCC setups. We need a work station for building kits for cars, bridges and structures. And we need a paint shop next to the spray booth for managing the various finishes for all of the above. Not to mention applying decals and building open loads. So we took the plunge and demolished the old workbench. 

Here it is in pieces,


And here is the space it left behind:


To the right and left of the space are old surplus kitchen cabinets from previous remodel jobs, that also are sub-optimal storage solutions at best, and will probably go too. And I don't know what to do with the pile of scraps on the floor. A lot of brainstorming is going on right now. But with nine to twelve or even fifteen linear feet to work with, and a depth of just over two feet, we should be able to come up with some specialized workstations to make the railroad a lot easier to build and maintain. We'll keep you posted, and let us know if you have any good ideas for how juggle work space, tools and supplies for specialized tasks like we model railroaders engage in....

Wednesday, November 23, 2022

Paperwork for activating the new staging yard BRJ

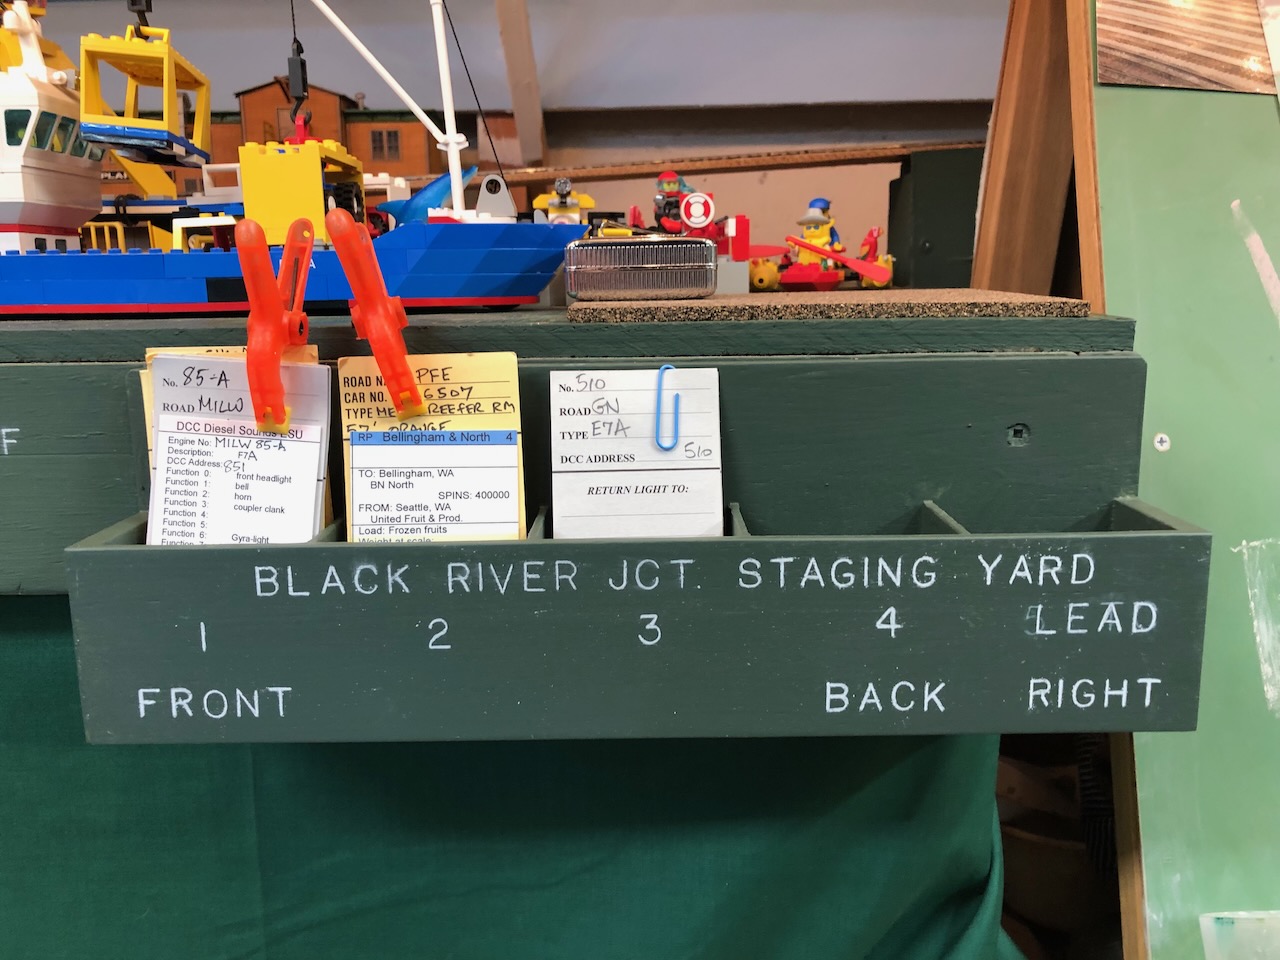
 "BRJ" stands for Black River Junction, the name I'm giving to the new staging yard we just installed in the space between Interbay yard and Harbor Island/Legotown. It's main role is to store the UP & MILW transfer freights and BN passenger trains off the layout to allow the Argo yard to be more useful to operators. The yard is physically complete, but for it to truly be in operation, it needed a diagram showing which tracks are where and called what, and some car card boxes conveniently located for storing the car and loco cards accompanying the stored trains.

Here's the track diagram I came up with. Its somewhat antiquated layout style is based on the BN SPINS diagrams of the era, so it will fit in to the SPINS booklet that operators can use to navigate the layout. I also will post the map next to the car card boxes to allow quick reference.


You can see at the top of the diagram a short spur labeled "MILW LOCOS", which will be a small engine servicing facility for MILW and UP loco storage to also get those locos off the active part of the layout. This will free up space at both Stacy and Argo yards, and it is under construction.

The other "accessory" the yard needed was some car card boxes labeled for the various tracks. Here's what I came up with for that:


Here's a cropped version of the map, rotated so you can compare the box labels to the maps. As you can see, we already have some of the tracks filled with their intended subjects.


I'll post a picture of the new MILW engine terminal as soon as we get it built. All in good time...

Thursday, October 27, 2022

Mocking up another narrow gauge extention

There's a ravine in the scenery above Mukilteo on my Burrlington Northern HO/HOn3 layout just the right size for a small mine, and at just the right height for being reached by an extension of the narrow gauge line to the existing "Cascade Copper Company" mine. The only thing better than one mine is two mines, right? I've been thinking about installing this line for some time now, but Robin Peel brought over a piece of foam-core and is determined to make it happen. Here is an overall photo of his mock-up of where the line could go:


As you can see, a lot of bridges and trestles are going to be needed, and we're already committed to the project, as you can see by the bare pink foam where there used to be rocks. The existing Cascade Copper Co. mine is in the very lower right corner, and the new mine site is off the photo to the upper right. Here's a photo of the right side where the ravine is that will be excavated for the new mine (after we get the track in, which could be a while...):


It's going to be fun designing and building all those bridges and trestle. I'm looking forward to it, and glad that Robin got the project started with this template made of foam-core from an old poster.

Monday, October 3, 2022

What? Another staging yard??

It's just that we've been running into problems operating the Argo Yard, south of Stacy St., because it does triple duty as the Amtrak Coach yard, UP interchange and MILW interchange. So it tends to be all plugged up, almost all the time. I got to thinking (never a good thing!), what about the unused space behind the angle braces holding up Interbay yard, which could be accessed by a switch off the downhill grade to Harbor Island (formerly Legotown) below it? Here's a picture of the target area:


And here's the view of all that wasted space underneath Interbay yard behind the angle support beams. There's room in there for at least three tracks - enough to offload Argo just fine:


It just so happens that when I was helping Al Frasch dismantle his huge N scale layout on Whidbey Island a few years ago (before he moved to Tucson and built another one) I salvaged a plywood shelf 6" wide and about 18' long - perfect to slap into this space. So, after months of dithering on this and that (like hosting the National Narrow Gauge Convention over Labor Day weekend), I got started on the project. Here are two shots of the first (of 3) six foot long sections of the new staging yard. Since it's pretty hard to reach in there, I'm finishing it on the workbench as far as I possibly can, so all I'll have to do in that confined space is screw in the three sections to the wall studs and slide the rail joiners to connect the sections.


In the second photo, you can see I've glued the track down and put weights on it while it dries overnight. I like to glue my track down with liquid latex diluted about 3:1 with water, so if I ever need to make changes it's not too hard to pull up the track. I'm afraid to use more permanent bonds like caulks or white glue, although it's true that you can just wet down the white glue if you want to make a change. I'm just used to using liquid latex, so I keep using it.

Anyway, that's one of the current projects going on around here. Soon I'll report on another - an extension of the narrow gauge mine branch to a secondary mine shaft. The fun never stops!


Sunday, July 3, 2022

Developing the "South Seattle Intermodal Terminal"

As you know if you're a model railroader, it takes a lot of space to model just a small portion of any sort of intermodal terminal. In my case, modeling the BN in 1973, I am fortunate that the intermodal line of business was in its early stages, so I can get by with less space for this than modelers of later eras. But there is no doubt that most manifest trains carried at least a car or two of "trailer on flat car (TOFC)" by 1973, and in the BN's case, they started a dedicated intermodal service between Seattle and Chicago, called the "Pacific Zip" (train #3) in the westbound direction and the return trip named "Train #4", both at passenger train speeds or better. It was a very overpowered and short train at first, while the business grew, which is very fortunate for me, since (1) I have an awfully lot of locomotives, and (2) it takes less space to credibly build a shorter train.

So, what I did was to install a six-foot long section of track in between the South Seattle mainlines and the Lonestar Cement complex at the end of the aisle to the right of the Argo Yard, with just enough space between them to park a row of trailers or containers next to the track. Not enough space for the lifting equipment, but at least enough to call it the "South Seattle Intermodal Terminal" and to park 4 long TOFC flatcars on it, enough to make a short, but convincing, Pacific Zip #3 or #4.

It goes without saying that just staging the Pacific Zip #3 or #4 in "Tacoma Staging" just off the layout from there would work too, without taking any real estate at all (other than taking up a staging track). But, the prototype trains were broken down and made up in Stacy St. Yard, not in the Intermodal Terminal, and this was done by a special switch job called "Crew 6". What fun to terminate the westbound Zip in Stacy St and have a switch crew quickly remove the express boxcars off the back end and then shove the intermodal cars down to the Intermodal Terminal, as the prototype did. Also, since my south staging yard is hidden beyond the ladder (don't do this if you have a choice!), it is easier to change out the trailers and containers if I have the cars parked on a track I can see and reach.

All of this is to say that Magnus Christerson has recently been adding some "craft foam" pavement and a guard shack to the scene approaching the South Seattle Intermodal Terminal. Here's what it looks like so far. We plan to apply striping and grey pan pastels to the black surface to match the sanded grout paving behind that area, so we're not finished. But it's progress, and that's what this blog is all about! Enjoy!


Thursday, May 5, 2022

Re-numbering the new Bowser SP&S RS-3's


Is there such a thing as "too much of a good thing?" In this case, I ended up with three of the new Bowser SP&S RS-3's, but then I found out that the number of one of them already belonged to a BN green RS-3 that is active on my roster, which I had previously re-numbered from 4082 to 4072. And I had two copies of the new Bowser 4077. What to do? Having watched Tim Taylor successfully renumber a few of my other locos, I decided to take the plunge and see if I could do it.

The first thing was to decide what new numbers to use. We are fortunate to have online photo archives now, so you can just search the web for a particular loco number and see photos of it. I also consulted my 1973 BN Annual to find out which loco numbers were still on the roster in 1973. The decision was to renumber the extra 4077 to 4067, and the redundant 4072 to 4075.

Having decided that, the project involves two steps - the numbering on the side, and the numbers in the numberboards. For the first step, I used some "Micro-sol" and a toothpick to gently wipe off the one number that I planned to change on each side of each loco. I didn't have any decals of numbers the right size or dark color of the numbers I was removing, but I did find I had a dry transfer set with black numbers approximately the right size. So I rubbed the dry transfers on, as you can see in the photo above.

For the second step, I also didn't have numberboard number decals the correct size, but the standard BN numberboard numbers, while slightly bigger, are close enough to do the job. So I carefully cut out the 5's and 6's that I needed, dipped them in water to remove the backing, and placed them on top of the existing number to be changed, wetting the area with micro sol before and after. Standard decal procedure. It was painstaking, but eventually finished. Now I plan to go back and apply micro set if needed to smooth the decals down, after the initial application dries in a few hours. Then later I can consider a layer of dullcote to seal the deal. And some pan pastels after that. You can count on seeing these beautiful looking and sounding locos in action in future videos on my YouTube channel. In the meantime, you can see a quick "Short" video of the three RS-3's on YouTube here.

The bottom line - don't be afraid to purchase more than one copy of a loco that you really "need" for your roster, and renumbering one or more of them. If I can do it, you can do it...

Sunday, February 27, 2022

Push Buttons for Delta Wye and Vail Jct.

Without going into detail about how difficult it is to stoop down underneath a model train layout and connect up wires between push buttons and circuit boards, let's just say that significant improvements have now been made to make it easier for operators to control the three powered turnouts at Delta Wye and the very difficult-to-reach powered turnout on the narrow gauge line at what I fondly call "Vail Jct.", named of course after the legendary HOn3 modeler Jim Vail.

The reason I procrastinated on this job for so long (do I need a reason?) is that the wye needs to be operable from either side of the peninsula, meaning double push buttons and their associated wiring. Here is an overview of the wye area from each aisle, followed by a detailed view of the push buttons themselves.


This wye has been in operation for at least 20 years, with powered switch machines which I controlled with the "macros" on the NCE DCC throttles, and the single pair of push buttons to the very right of the lowest photo and a corresponding pair on the left of the photo above it. I was very proud of how well this worked, and as you can see I mounted a complex diagram on the fascia explaining which macro controlled which route. My operators, however, had a different experience. They would be trying to run a train through the area, and would not be the slightest bit interested in learning how to use the macros on the NCE throttles. In some cases it may have been their first experience even using an NCE throttle, let alone selecting a macro on it. So, prodded by a recent quip from operator Jim Betz, I spent about 6 hours setting all the needed pushbuttons up. So, having done that, I hereby apologize to all the operators here for the last 25 operating sessions for not having installed these in the first place! Argh!

It probably goes without saying that, once again, I have cut corners here significantly by not setting the push buttons in from the outside edge of the fascia. This means that operators will accidentally bump up against some of the pushbuttons at the wrong time and cause random derailments. Rather than spending the time to do it right in the first place, I seem to have chosen to wait and see how much of a problem it causes before investing any more time in it. Also, I probably should draw the track plan of the wye to connect the pairs of push buttons to make them easier to understand. Chalk pencils to the rescue, at a minimum!

The other thing that goes without saying is that the whole complex would benefit significantly from some red and green LED lights to indicate which way each switch is currently thrown. I hear you. That would be another 6 hours or more, not to mention the study and design time. I started looking at LCC and have all the equipment needed to advance this wye area to a much higher level of user-friendliness, but then put it all away in a box until other things with a higher "priority" get finished. One day I'll get back to that and you will be the first to read about it here. In the meantime, it's great to get these pushbuttons in, and many thanks to Jim Betz for spurring me on!