Here's a view of the north end of the Interbay Car Repair Facility in Seattle on my HO scale Burrlington Northern model railroad, set in 1973, which is probably around the time that they built this modern three-bay car shop. The prototype facility has a ladder on both sides, but for many years I was satisfied with the tracks simply coming into the building from some switches on the other side and stub-ending on this side, as you can see in this photo, underneath the new Micro-Engineering switches that I've laid out on top of them.

For the last week, I've been working on installing these three switches. You can watch a YouTube live stream where I describe rail-filing and rail joiners at this link. For the rest of this post, I'll just show some more still photos of the progress so far. Here's an aerial photo of the area on my layout, which more clearly shows the existing straight tracks and my desired layout of switches to connect them.
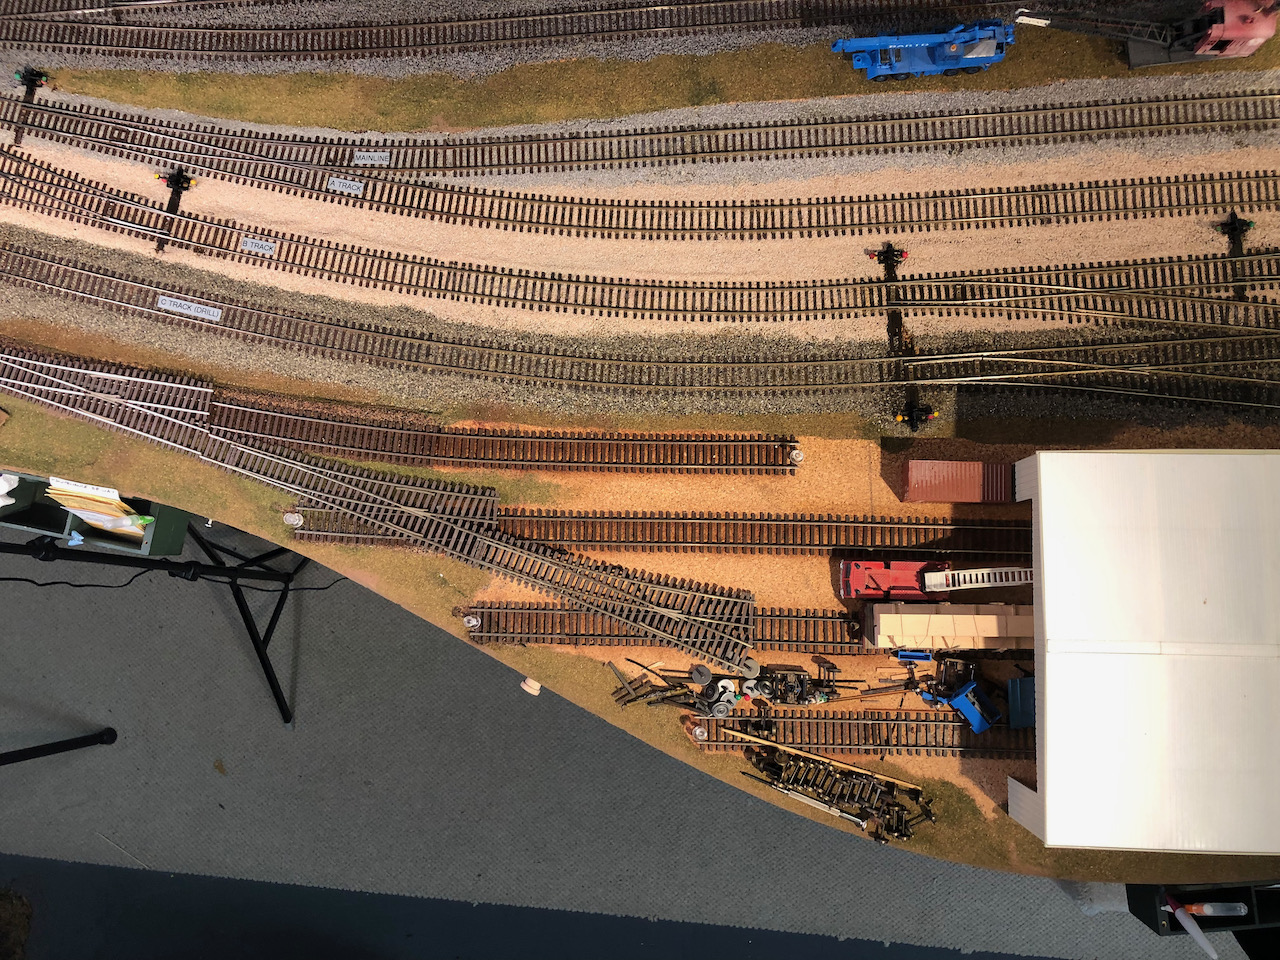
The first step was to remove the existing track, as needed. This was relatively easy, because I use liquid latex to glue down my track, so I can generally just reach underneath with a putty knife, as shown here, and lift the tracks up if I need to relocate them, such as I need to here.

Unfortunately, I had already ballasted the lead to this ladder, so I needed to wet down the ballast (held in place by water-soluble white glue) in order to cut some of the track and curve some of it.


The next step was to carefully align the track, hold it with push pins, and apply drops of liquid latex (diluted about 3:1 with water), and press the track down with weights as needed for vertical alignment. You can see that the mainline was temporarily out of service while I used it for storing the car repair shed and other tools and supplies.

After eight hours, when the liquid latex was dry, I came back and applied ballast to the area and glued it down with diluted white glue. When that dried, I installed Red Caboose ground throws (#206S has the right amount of throw for these Micro Engineering turnouts), painted their targets to match the opposite push-pin "faux-signals", cleaned the tops of the rails one more time with a bright-boy eraser, and did some final testing. So far so good. Now, if I could just find the craft foam that I bought to pave the tracks in and near the car shed, I would continue on with that phase of construction. Stay tuned. It's got to be here somewhere!


The other thing I need to do is figure out the operating implications of these new switches. Can I use this side of the shed for storing switch engines and, of course, the "big hook"? When cars are repaired, do they come out this side and need to be switched back into the main yard? What do you think?
No comments:
Post a Comment